Before you officially launch your blog, you need to go through the *right* steps for Showit blog setup –
Which is annoying, but only has to happen once!
If you have a NEW blog (and you’re not importing posts), you have a blank slate – which makes things super simple and easy to set up. Here’s everything you need to do to make sure your blog settings are correct in WordPress, so your posts do their job on your Showit website.
Wait, My WordPress Settings for My Showit Blog?
Yep, you read that correctly.
Showit partners with WordPress for content management (AKA, blogging) – so if you have a Showit website with a blog, you have both. You’ll adjust the design for all of your blog pages in Showit (drag, drop, done) then add blog posts to your associated WordPress account and watch them show up on your Showit website.
It’s a simple way to get the use of the most powerful content management system (WordPress) with the easiest, most aesthetic website designer (Showit).
For more about the WordPress/Showit combo, click here!
How To: Showit Blog Setup
If you’re starting a new blog, you’ll request a WordPress blog setup when you connect your website design to your domain.
💡 I recommend doing this 2-3 days before announcing your website on social media, to your audience, etc. This gives Showit some time to set up your blog, gives you some time to complete all of the settings and add content, and gives you the margin to make any design edits you want once there’s live content on your blog.
To start connecting your domain, navigate to the Showit builder and click “Site Settings” in the top left corner.
- Under “Custom Domain,” click “edit”
- Follow the steps, adding the domain you’ve purchased and indicating that you need a new blog set up
The Showit team will get to work on setting up your new WordPress blog that will connect with your Showit website design to display blog content on your live website.
You’ll receive an email when your blog is ready, along with the DNS settings you’ll need to add to your domain to launch your website and take it live.
How To Log Into Your Showit Blog
You’ll log into your blog by visiting yourwebsite.com/wp-admin.
By default, Showit sets the login information for your WordPress blog to be the same as your login for Showit (same email, same password).
WordPress Settings For Your Showit Blog
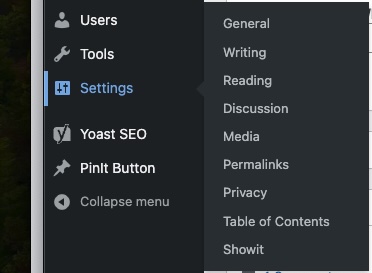
Here are all the settings you’ll need to check or correct for your new Showit blog! Find them by navigating to the left sidebar, and hovering over “Settings.”
General Settings
- Change your site title (to your business name)
- Upload your favicon – even if you already did in Showit! The one you added to the Showit app will show on non-blog pages, and the one you add to WP will show on the blog pages (just use the same file!)
- Update your timezone
- Optional: Change “week starts on” to Sunday – this is more personal preference, but affects how the calendar shows up when you schedule a post in advance.
Settings → Writing
- Optional: Choose a default post category for your posts to automatically use (if you don’t change this, they’ll be “uncategorized” by default – but you can add a category when you publish each post)
Settings → Reading
- “Blog pages show at most” → This setting will dictate how many blog posts show on the main blog page. If your blog feed is in columns (2 columns, 3 columns, etc), set this to a multiple of the number of columns (like 8 posts or 9 posts, respectively, for these examples).
- Optional: For each post in a feed, set to “Show excerpt” (otherwise, your blog feed will show the entire post and be cluttered).
Settings → Permalinks
The permalink is the way that your blog post links are structured! You can choose between things like yourwebsite.com/CATEGORY-NAME/POST-NAME, yourwebsite.com/POST-NAME, etc.
I recommend setting this as “Post Name” to keep your links short, clear, and evergreen (adding post dates can clutter things up, date old content, and are easier to mess up in the future – more data means more opportunity for human error if you ever change or update posts).
The Best Blog Plugins
WordPress plugins are like apps for your website. They add extra features or functionality without needing to know how to code. For example, if you want to add a contact form, improve your site’s SEO, or make your site faster, you can find a plugin that does that. You just install it, and it automatically adds those features to your WordPress site, saving you time and effort.
The main difference between the basic and advanced Showit blogging plans is your ability to install plugins.
If you chose the basic Showit blog plan, the only plugin you’ll really be able to activate is Yoast SEO – but you absolutely should.
If you choose the advanced blog plan, you can install almost any plugin (and therefore, get your website to do almost anything you want), which is why it’s always what I recommend.
Before your Showit blog setup is *officially* over, you’ll want to check out these plugins!
Yoast SEO
This is technically optional – but since it’s free, I don’t know why you’d ever skip it. Even on the basic Showit blogging plan with limited plugin options, you can activate Yoast SEO for real-time feedback on how well you’re optimizing each blog post for your target keyword.
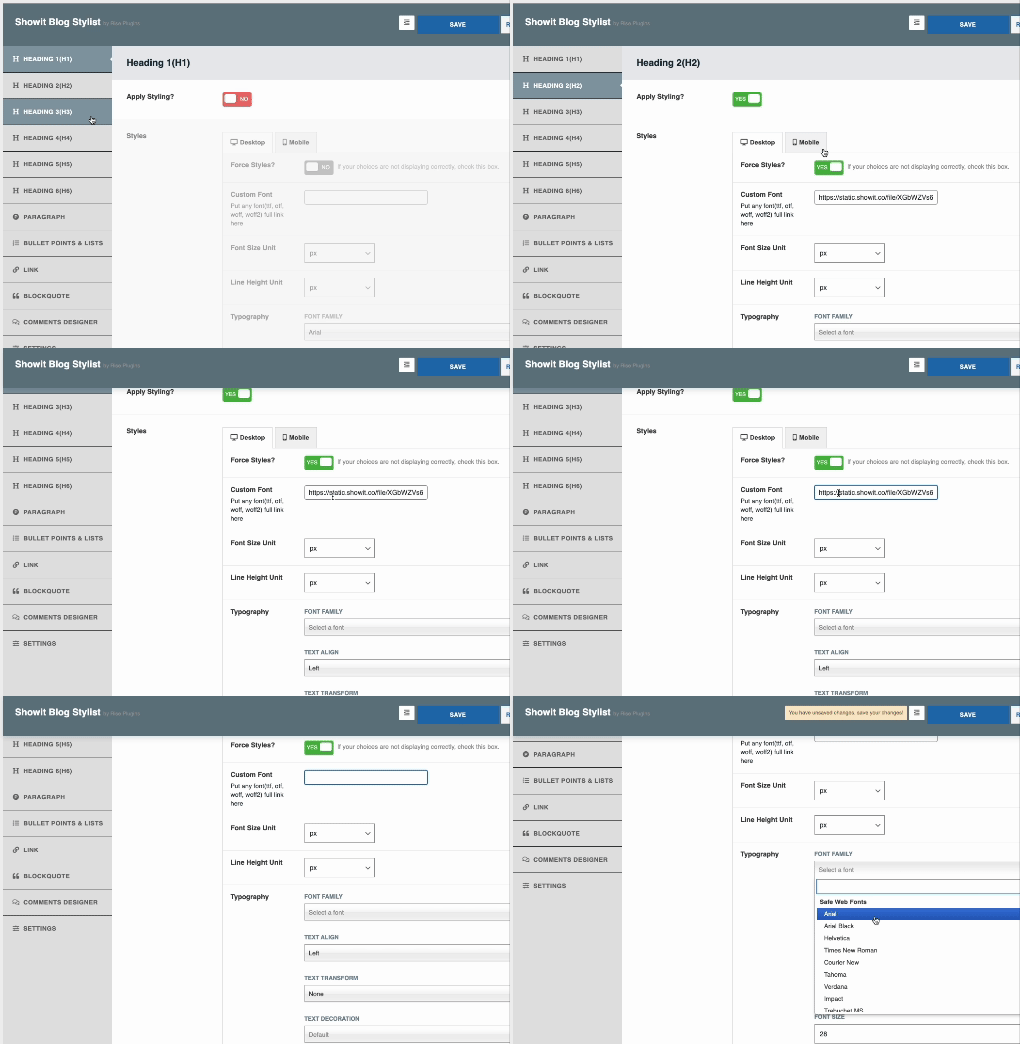
Showit Blog Stylist Plugin
This plugin by Rise Plugins is one of my favorites – it lets you style your Showit blog posts (the fonts, quotes, etc) independently of the design settings in your Showit website.
Obviously, you’ll want your content everywhere (blog post or not) to be accessible and readable – but for long-form content like blogs, I love when websites take it a step further and use even more skimmable fonts for blog post content.
Now that you’re done with your Showit blog setup, you’ll probablyyy need some ideas to go with it – which means it’s time to do some keyword research! It doesn’t have to be overwhelming, I promise:
>> Start with this blog post to learn how to find SEO keywords, or
>> Get the $97 Search Party workshop that’ll un-complicate SEO for you, show you how to pick keywords your ideal clients are searching for, and how to actually use them correctly.